
Aaron and I tend to take our time when it comes to hanging up art and photos on our walls. We’ve lived in our house since Labor Day 2018 and we just now decorated our front entry way with a photo gallery wall. We even had a house warming party at the end of December with barely anything on the walls! Last week we had a party to celebrate Aaron’s college graduation and received so many compliments on our photo gallery wall. I wanted to create the photo gallery wall myself with Aaron so that I could document via time-lapse how we created it and share all the tips and tricks with you. Except, Aaron is super handy and visual when it comes to things around the house and he just did in one evening while I was out of town as a surprise. As I talked through the steps of how he did it, I realized that creating a photo gallery wall is common sense to him and most people (myself included) probably lack that sound subconscious intelligence. I decided to outline Aaron’s instructions below along with other tips I found on the world wide web. I broke each step into General Instructions and then a description of the TFK way!
Step 1: Do Your Research (Location + Style)
Instructions: Go to Google (Instagram and Pinterest work well too!) and search “Photo Gallery Wall.” There are a lot of great websites that share different photo gallery types, different instructions (pick one that makes the most sense to you and how you think/envision the photo gallery wall), different material styles, and different locations/spaces.
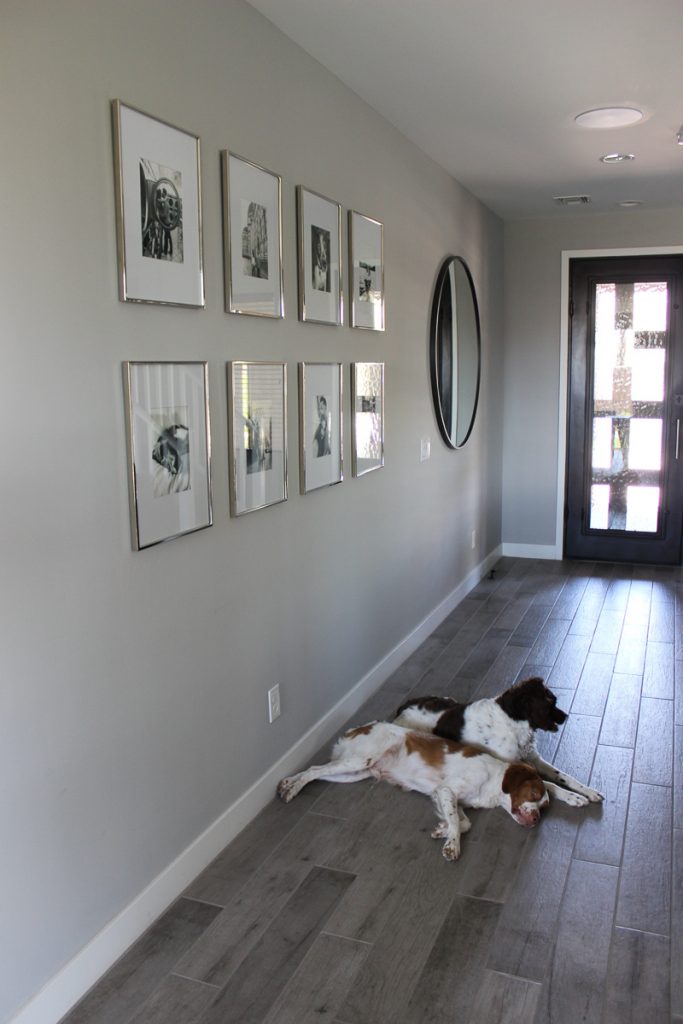
TFK: For us, I had a photo gallery wall in our old house that looked like a collage. It was different sizes, different materials, and it was in a small space above my desk. I loved it because it truly encompassed what I love and how I am. In our new house, we have a large space at our front entryway that might look too cluttered (to Aaron’s liking) if we did a large collage photo gallery wall. Instead, we decided to do a grid photo gallery wall with the largest frame that we already owned from our previous gallery wall. These Gallery Frames are from West Elm, so when we were in the store looking at other furniture pieces, we spoke to a designer who helped us solidify our need for this grid-style photo gallery wall.
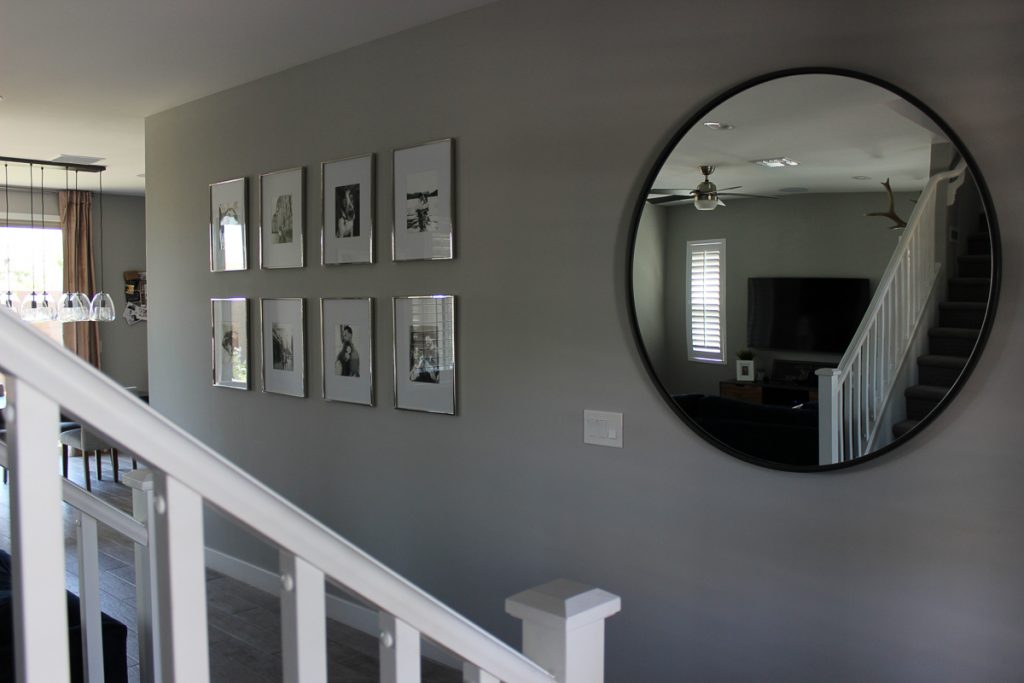
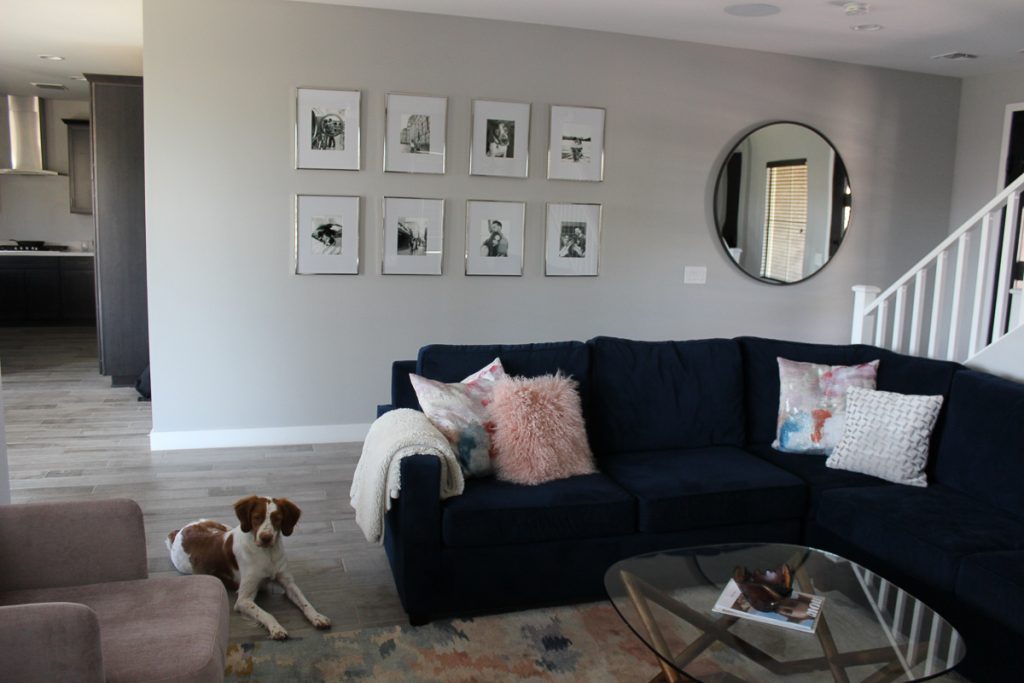
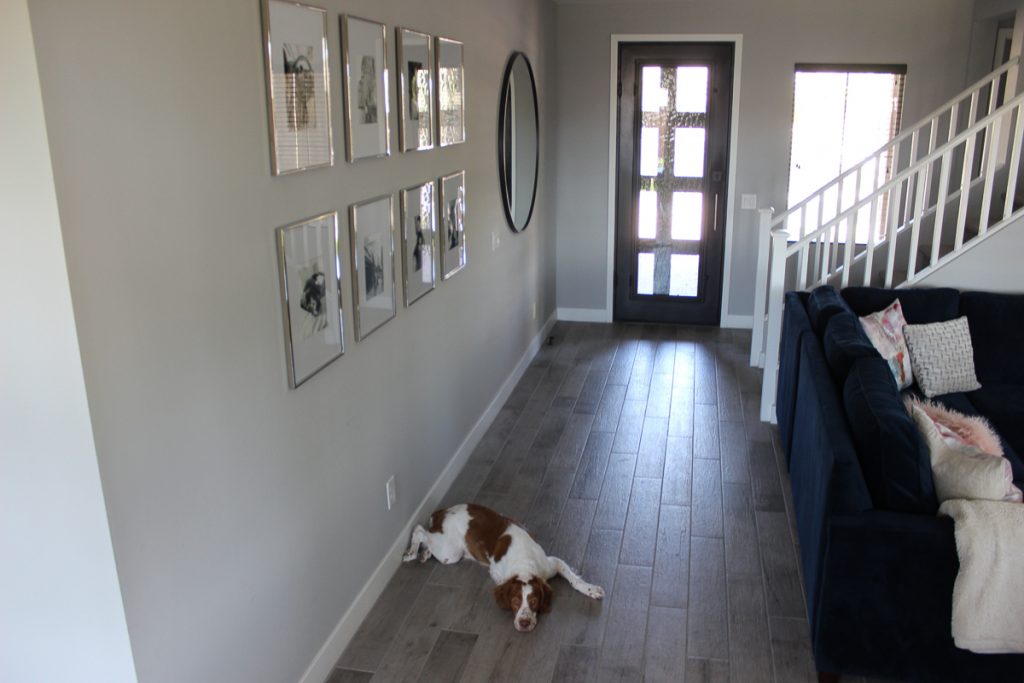
Some people say you need to decide what gallery style you want first, while other people say that you need to pick the location first. I truly think that in order to come up with the best fit, you need to be open during the idea conception phase. As we were talking to the West Elm designer and showing her photos of the wall space, she suggested breaking the wall up into two separate spaces rather focusing on this large space as a whole. This completely changed our mindset. Now we have a front entryway right next to the front door and the stairway, and a separate gallery hallway between the same wall and the back of our couch/living room. This created a simplified way for us to visualize what we can do with that wall space. Plus the large Metal Framed 48″ Round Mirror from West Elm is perfectly framed by the entry of the stairwell.
Resources: Pottery Barn has a great article that outlines multiple photo gallery wall layout options here. I also love this article by FrameBridge that shows a few different photo gallery wall layouts too.
Step 2: Think About Your Home Style (Frames + Photos)
Instructions: Now that you’ve done your research and have an idea of the the location (and size) along with the style of the actual photo gallery wall (the configuration of frames) you can start to think about the material you want your frames to be, where to buy them, and the look/feel you want your photos to create.
TFK: Since we already had two frames from a previous gallery wall, it made it really easy for us to decide on the material, size, where to buy them from. However, we wanted to confirm our decision, so we thought about it like this… our front door is a dark black iron, so next to the door we continued that color pattern into our Metal Framed 48″ Round Mirror from West Elm in antique bronze (also a dark black iron.) In order to break up this large wall and create two different spaces, we decided to switch material colors. In our kitchen, which is where the gallery wall lead you, are chrome fixtures. We thought chrome (or polished nickel) would be the best material for the frames because it branches the color of the door handle, faucet, and curtain rods into the living space. We also loved breaking up the shapes with the juxtaposition of the round West Elm mirror and the rectangular West Elm Gallery Frames.
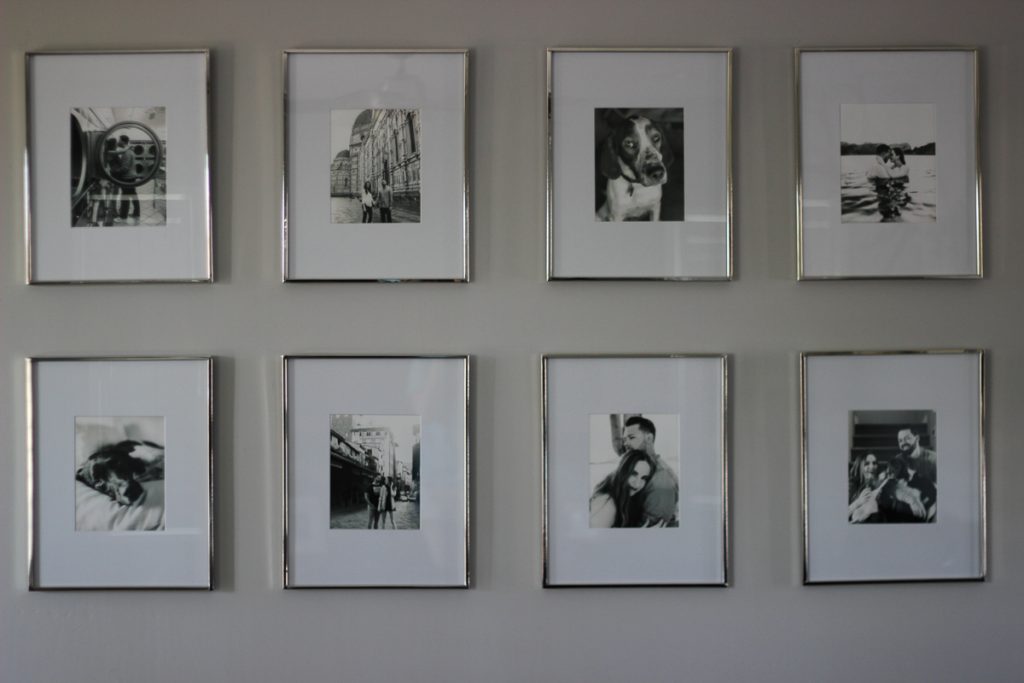
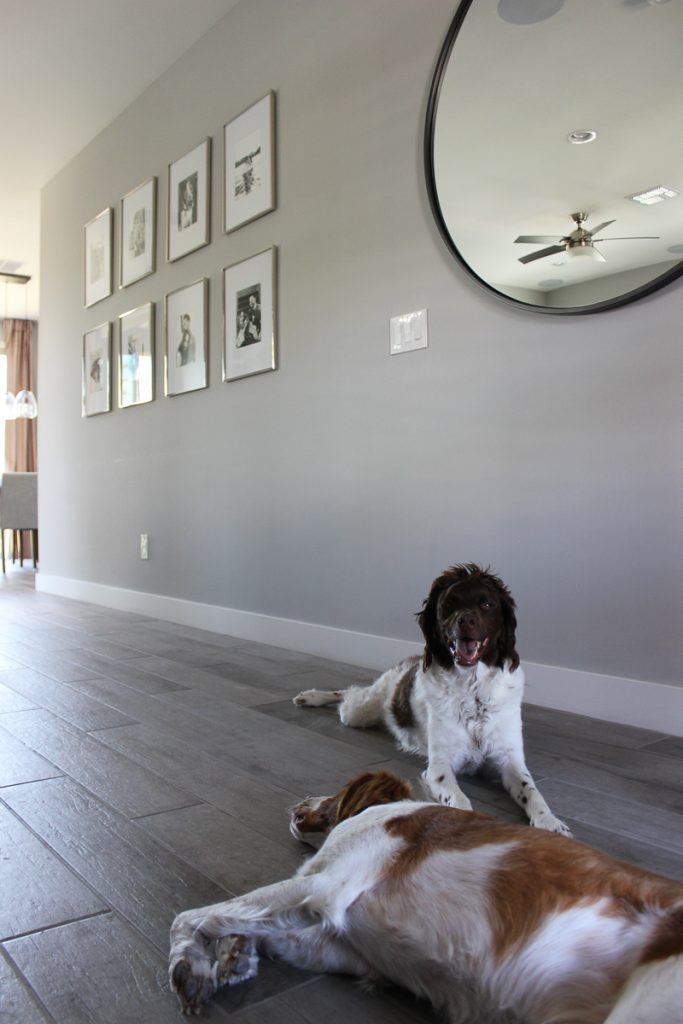
Something that seems to be an after thought for many people are the actual photos. Depending on how you size your frames and what material your frames are, will factor into how your actual photos will look. For example, Aaron and I have professional photos that we’ve taken over the years that hold really special memories for us. We wanted our photo gallery wall to portray that and makes us happy when we look at it. Since we’ve worked with many photographers, the photos also display many different filtering and exposure styles. It was important to me to have one cohesive feel for the images, so we decided to turn each photo to black and white. We have a lot of color in our living room, which the gallery wall looks into, so going monochromatic felt like the right call for us. Especially since the grid-style photo gallery wall is so uniform. Having photos in color might make the wall look disjointed. For some gallery walls, it makes sense to have photos in color. Worst case scenario, you can always reprint photos if you want! Another concept I wanted to portray is the chronological order of the memories we’re displaying. I chose to have the photos in order of the time frames so that it would full encompass our lives together along with our furbabies (The Foxy Pups.)
Step 3: Calculate Your Dimensions (For a Grid-Style Galley)
Instructions: This step comes in handy before you actually purchase your frames. If you have a frame size in mind or a couple frame sizes in mind, you can test out how these might look by doing some math. Take the full width of your photo gallery wall. Create an estimate of how far in you’d like your frames to start on each side. You can based this on surrounding furniture. Take the length of the photo gallery section where only the frames will be. Divide that width by the width of the frame you’re interested in. That will give you the maximum number of frames without any spaces. From here, you should multiple your frame width by how many frames you’re thinking that will be in one row. Subtract the total width of the photo gallery section by the total width of frames you’ll have in a row. Divide the remaining space by how many spaces you’ll have between your frames. For example, if you’re going to have 4 frames in one row, the total amount of spaces you’ll have will be 3. You can use blue painters tape to tape the edges of where your frames will go on the wall to test out the spacing. Play around with these measurements until you have it just right! As for the height of your photo gallery section, Aaron taught me that a general rule of thumb is to hang artwork at eye level, which he learned from this Martha Stewart article. So, you’ll want to make sure that the center point of your photo gallery wall is at eye height. From their you can build your frames up and down to create your space.
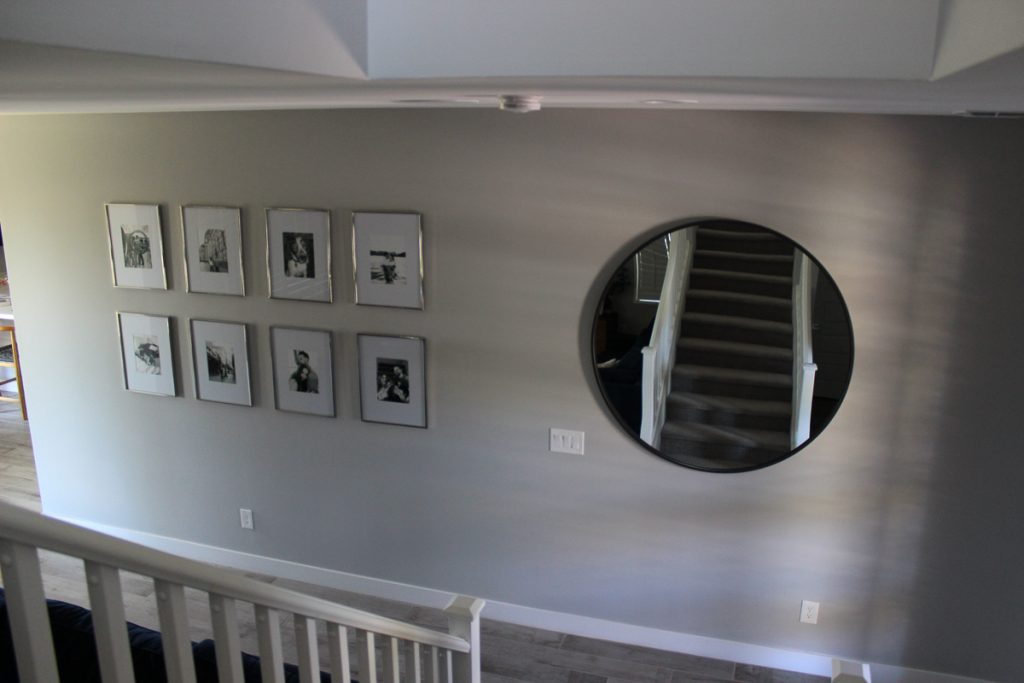
TFK: Photo Gallery Wall Width – When working with our large wall space, we centered the West Elm Metal Framed 48″ Round Mirror on the stairwell opening. For there we measure the remaining space and centered the photo gallery in that space. Aaron understood the overall dimensions of how big we wanted the gallery to be in reference to the frames because of how our couch in front shaped the room. Initially the overall space wasn’t a calculate assessment, but more of an estimate based on eye and look. In order to figure out how many frames we wanted, we took the overall length (149″) from the left edge of the wall to the mirror, then measured how far in from the wall to where the couch is in front (34.5″) which is where the left edge of the frame will go, and we added that same measurement to the left side of the mirror, which is where the right edge of the frame will go. That gave us 80″ for our photo gallery section. Aaron took the full width of the photo gallery section (80″) and divided it by the width measurement of the frames (15.5″). That equals a little over 5 frames, but at further thought we wanted an even number of frames in each row and wanted to be sure there was enough space between each frame, so we decided to do four frames in a row. We took the width of the frames (15.5″) and multiplied that by 4 (the number of frames we want) to equal the amount of space the frames will take up (62″). Then we took the full width of the photo gallery wall section (80″) and subtracted the amount of space the frames will take up (62″), which equals the total amount of space we can work with between the frames (18″). With four frames, we need a total of three spaces, so 18″ divided by 3 equals 6″ and that is how we determined the space between each photo.
Photo Gallery Wall Height – Aaron hung our Round West Elm mirror first according to the “artwork at eye level” rule, so he made sure that the gallery wall would be the same or close to the same height as the mirror. We have 9 foot ceilings, so we have a little room to work with on our wall. Aaron decided on doing the midpoint of the gallery about 57″-60″ from the floor. When conceptualizing how tall or how low we would want the gallery wall, it made sense to have a row just above the center line and a row just below. Having a third row above or below that would be too close to the ceiling or to close to the ground. We could have shifted a row to be the centerline, but we thought it would be overbearing for the size of our wall.
Step 4: Lay It Out
Instructions: Once you have the frames in hand, it is so important to lay out the frames to visualize how it will look with proper spacing because hammering holes in your walls. Hopefully you saved the notes from the previous step about how much space will be between each frame. Some people recommend cutting our life-size pieces of paper that mimic your frames so you can tape those to the wall. I highly recommend doing this step for a collage-style photo gallery. For the grid-gallery, I don’t think it’s as necessary. We simply laid the frames against the wall and on the floor to visualize it.
Resources: This HomePolish article and this Better Home & Gardens article both do a great job of showing you how to lay it out on the floor or by taping up pieces of paper.
Step 5: Gather Your Tools / Put Holes in Your Walls!
Instructions: Remember when I said that Aaron has common sense about creating a photo gallery wall? Well I was mainly talking about this step.
Paper Frames – If you still have your taped up paper frames on the walls, you can mark your hang points directly on the paper. Make sure you understand if your frame has one hang point or two. Also, you will need to measure the exact placement for where the hang points are and make sure you replicate that for each frame if the are duplicate frames. If the frames have different hang points, it can be kind of tricky. Practice putting a nail or screw into the hang point and measure it that way.
No-Paper Frames – If you did not tape paper frames on the wall, you can follow Aaron’s lead. He used masking tape on the wall in order to not leave marks on the wall. He hand measured everything out to perfection with a lever. There are handy frame hanging devices if you don’t trust yourself, like this one. Then, Aaron was ready to put holes in the wall. He used anchors because of the weight of the frames and because it’s the wall the buds up to both our front and garage doors. Once the anchors/screws were in, it was time to hang the pictures!
Resources: Here is a general article by the Huffington Post that outlines things to think about when creating a photo gallery wall.
SHOP MY WEST ELM HOME PRODUCTS FROM THIS POST

If you’re creating a photo gallery wall, please leave comments below with what you thought was easy/hard during the process, or if there was anything specifically helpful from this post. If you’ve already created a photo gallery wall, I’d love to hear your tips and tricks that aren’t already covered! Comment below and as always…
Be Bravely, You!
The Foxy Kat


